
How to Salvage a Dropped Perfume Bottle That Cracked?
Your favorite perfume bottle just slipped and hit the floor. Now you see a crack, and panic sets in.
Don’t worry. You can still save that fragrance you love.
A dropped bottle looks scary, but it’s not always a lost cause. Many cracks stay small and manageable. Even a stuck nozzle can get fixed with the right approach.
This guide walks you through every step. You will learn how to handle broken glass safely first. That part matters most.
In a Nutshell
- Safety first. Always wear gloves when you clean up broken glass. Use a sturdy container to hold any sharp pieces safely.
- Extract the perfume. Move your fragrance to a new container before you start any repair work. This step protects your scent from damage.
- Clean and dry properly. Wipe the cracked area with alcohol. Let it dry fully before you apply anything else.
- Apply epoxy the right way. Put epoxy resin only on the outside of the crack. Never apply it inside the bottle.
- Wait for it to cure. Give your repair 12 to 24 hours to set. Using the bottle too soon can ruin your fix.
- Handle stuck nozzles with care. Grip the stem base with pliers and wiggle it gently. Pulling straight back often makes things worse.
Assessing the Damage: Crack, Chip, or Nozzle Separation?
When your perfume bottle hits the ground, the first step is understanding what actually broke. Different damage types need different fixes, so take a moment to inspect carefully.
Cracks appear as thin lines running across the glass surface. They may be hairline cracks you barely see, or larger splits that go deeper into the bottle. Hold the bottle up to light to spot them clearly. Cracks usually don’t leak right away, but they weaken the glass and will spread over time.
Chips are missing pieces of glass, often found on the bottle’s edges or corners. A chip is easier to spot than a crack because you can actually see the damaged spot. Chips don’t always affect the bottle’s ability to hold liquid, but sharp edges pose a safety risk to your hands.
Nozzle separation happens when the spray mechanism pulls away from the bottle’s opening. This is super common after drops. The nozzle might stick slightly, sit at an angle, or come off completely. You can usually tell because the spray doesn’t work right, even if the bottle itself looks fine.
Internal tube damage is trickier to spot. The tube inside the nozzle might bend or break, stopping the spray from working. The bottle looks okay from outside, but the mechanism fails.
Take your time examining the damage. Look at the crack’s length and direction. Check if the nozzle twists or pulls loose. Test the spray to see if it still works. This quick assessment tells you exactly what repair method you need next. Knowing your damage type saves you time and effort.
Safety First: Handling Broken Glass and Spilled Fragrance
Handling broken glass and spilled fragrance requires care and attention. Your safety comes first when dealing with this situation.
Wear protective gloves before you touch anything. Thick rubber gloves protect your hands from sharp glass edges. Nitrile gloves work too, but thicker materials offer better protection. Never handle broken glass with bare hands, even if the pieces look small.
Gather a sturdy container or small box nearby. This gives you a safe place to collect glass fragments as you work. A dustpan and brush help you sweep up tiny shards that scatter across the floor. Work slowly and deliberately to avoid cuts.
Extract your perfume first if the bottle still holds liquid. Pour the fragrance into a clean, dry container with a tight lid. Use a funnel to prevent spills. If the crack is small, you may save most of your fragrance. Work over a sink or tray to catch any drips.
Clean the cracked area thoroughly with rubbing alcohol. This removes any debris, dust, or residue stuck in the break. Use a clean cloth or paper towel to wipe the area dry. Let it air dry completely for a few minutes before moving forward.
Ventilate your workspace well. Perfume vapors and alcohol fumes can build up in closed spaces. Open a window or work near a fan to keep air moving around you.
Keep paper towels and a trash bag handy. You will need them for cleanup. Never rush this process. Taking time now prevents injuries and protects your fragrance from contamination. Once you have handled the glass safely and extracted your perfume, you are ready to assess repair options.
Step-by-Step: Cleaning and Sealing a Cracked Bottle
After you’ve cleaned the cracked area with rubbing alcohol and let it dry completely, you’re ready to apply epoxy resin. This is the key step to stop the leak and strengthen the glass.
Apply epoxy only to the outside of the crack. Never put epoxy inside the bottle where it could mix with your fragrance. Use a small applicator or wooden stick to work the epoxy into the crack carefully. Press it firmly into all the gaps so no air pockets remain.
Smooth the epoxy along the crack line. You want an even coat that covers the entire damaged area. Work quickly but carefully. Epoxy starts to harden fast, so don’t waste time.
Now comes the hardest part: waiting for the cure time. Most epoxy resins need 12 to 24 hours to fully set. Don’t rush this step. Using the bottle too soon will ruin your repair and waste the epoxy.
Place your bottle upright on a clean, flat surface while it cures. Keep it away from direct heat or sunlight. These conditions can weaken the bond. Make sure nobody bumps or moves the bottle during this time.
Once the epoxy is completely hard, test the repair by gently running your finger over the crack. It should feel smooth and solid. If you see any gaps or soft spots, apply another thin layer of epoxy and wait another 24 hours.
Your sealed bottle is now ready to use. The crack is sealed, and your perfume should stay inside. Handle the bottle gently going forward. Even though it’s repaired, the cracked area remains weaker than the original glass.
Fixing a Stuck or Detached Nozzle
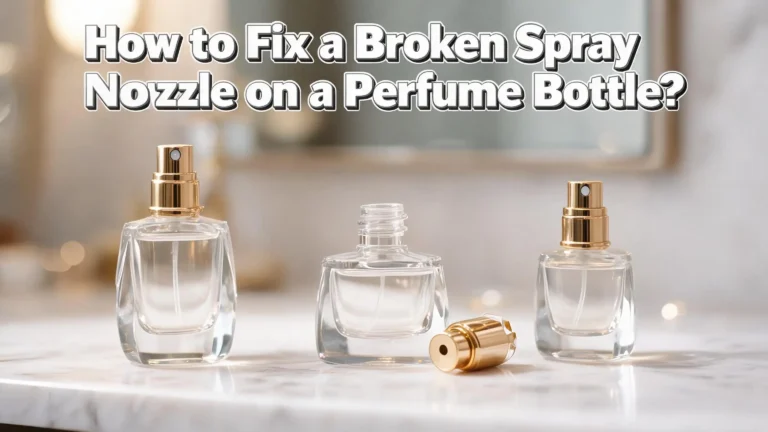
A stuck or detached nozzle is one of the most common problems after a perfume bottle drops. The spray mechanism can jam inside the bottle opening, or it may separate completely from the fragrance container.
Identifying the problem comes first. Check if the nozzle simply won’t spray, or if it has actually pulled away from the bottle. A stuck nozzle often feels tight when you try to press the spray button. A detached nozzle may sit loose in the bottle opening or fall out entirely.
Removing a stuck nozzle requires patience and the right technique. Grip the stem base (the narrow part just below the spray button) firmly with pliers. Wiggle the nozzle gently back and forth in small motions. This loosening action works better than pulling straight up, which can break the internal tube inside your bottle.
Apply steady pressure while wiggling. You may hear a small pop or feel resistance give way. Once it moves freely, you can carefully pull it upward at a slight angle.
Reattaching a detached nozzle is straightforward if the internal tube is intact. Simply push the nozzle back onto the bottle opening until you hear a click. Make sure it sits flush and centered.
Test the spray mechanism before returning your perfume to regular use. Press the button several times to check for smooth operation. If the nozzle still feels stuck after wiggling, the internal tube may be damaged. In that case, you may need to transfer your fragrance to a different container to preserve it.
How to Extract and Preserve the Perfume Before Repair
Before you repair a cracked perfume bottle, extract the fragrance inside. This step protects your perfume and makes repairs easier. You’ll also prevent epoxy or glass fragments from contaminating your scent.
Start by gathering clean containers. Use glass jars, small bottles, or even clean cups to hold your perfume. Make sure each container has a lid or cover to prevent evaporation. Perfume loses its potency when exposed to air.
Carefully pour the perfume from the cracked bottle into your clean container. Work slowly over a sink or tray to catch any drips. If the bottle won’t pour smoothly, use a small funnel to guide the liquid. A coffee filter placed inside the funnel catches any tiny glass particles.
Check your extracted perfume for debris. Hold the container up to light and look for glass shards or dust. If you spot particles, strain the perfume through a fine mesh filter or cheesecloth into another clean container. This simple step saves your fragrance from damage.
Label your container with the perfume name and extraction date. This helps you remember what you’re storing and when you salvaged it.
Store the extracted perfume properly. Keep it in a cool, dark place away from direct sunlight. A closet or cabinet works well. Avoid areas near heat sources like radiators or sunny windowsills. Proper storage prevents the fragrance from degrading while you repair the bottle.
Once your perfume is safely stored, the bottle is ready for repair. You’ve eliminated the risk of contamination and can focus on fixing the damage without worry. Your fragrance remains fresh and usable while you work on restoring the container.
Curing Time and Testing the Repair Safely
After you apply epoxy resin to your cracked bottle, patience becomes your best tool. The cure time determines whether your repair holds or fails. Most epoxy resins require 12 to 24 hours to fully harden. Check the instructions on your specific epoxy product for exact timing.
During curing, place your bottle upright on a clean, flat surface. Keep it away from vibrations, pets, and children. Avoid moving the bottle or touching the repair area. Any disturbance can weaken the bond before it sets completely.
Test the repair carefully once the epoxy hardens fully. Run your finger gently over the cracked area. The surface should feel smooth and solid. If you notice soft spots or flexibility, the epoxy hasn’t cured completely. Wait another few hours and test again.
Before returning your perfume to the bottle, inspect the repair from multiple angles. Hold it up to light and look for any gaps or weak spots along the crack line. A proper repair shows no separation between the epoxy and glass.
Now test the spray mechanism. Fill the bottle with your extracted perfume and reattach the nozzle. Spray a few times into the sink or trash. Listen for normal spray sounds and watch the mist pattern. Weak sprays or sputtering indicate the internal tube may need attention.
Check for leaks around the repair area. Spray over a paper towel and observe for any dripping along the crack. A successful repair stays completely dry during normal use.
If everything works smoothly, your bottle is ready for regular use. Return your perfume to the repaired bottle and store it properly in a cool, dark location.
Common Mistakes That Ruin a Repair Attempt
Many people damage their perfume bottles further while trying to fix them. Understanding these mistakes helps you avoid costly errors during repair.
Pulling the nozzle straight back is the biggest mistake. When you yank it directly upward, you risk breaking the internal tube or spray mechanism. The correct method involves gripping the stem base with pliers and wiggling it side to side with gentle, steady pressure. This loosens the connection without forcing breakage.
Applying epoxy resin inside the bottle is another critical error. Internal application traps the epoxy near the fragrance and can contaminate your perfume. You should only apply epoxy to the outside of the crack. This keeps your fragrance clean and prevents the repair from affecting the spray mechanism.
Rushing the curing process causes repairs to fail. Many people try using their bottles before the epoxy fully hardens. You need to wait the full 12 to 24 hours. Testing too early means the repair isn’t strong enough to hold the perfume, and you’ll end up with leaks.
Not extracting perfume before repair creates unnecessary mess and risk. Attempting to fix a bottle while it still contains liquid makes cleanup harder and can spread fragrance everywhere. Remove your perfume first, then work on the bottle.
Skipping the cleaning step also weakens repairs. Dust, debris, and residual fragrance prevent epoxy from bonding properly to the glass. Always clean the cracked area thoroughly with alcohol and let it dry completely before applying any repair material.
Finally, ignoring safety precautions puts you at risk. Handling broken glass without gloves or proper containers can cause cuts. Always wear protective gloves and use a sturdy container when collecting glass pieces.
Troubleshooting: When the Spray Mechanism Still Fails
Sometimes your perfume bottle survives the drop, but the spray mechanism stops working. This is frustrating because the bottle itself appears fine. The problem usually lies inside, where the internal tube or nozzle assembly got damaged.
Start by checking if the nozzle sits properly on the bottle opening. A loose nozzle won’t spray correctly. Remove it gently and inspect the stem base where it connects to the bottle. Look for cracks or bent parts that prevent a tight seal.
If the nozzle seems intact, the issue might be an internal blockage. Perfume residue or debris can clog the spray tube. Remove the nozzle and try pressing it down several times over a sink. This action sometimes clears minor clogs. You may see a small burst of perfume spray if the blockage breaks loose.
For a stuck nozzle that won’t budge, grip the stem base firmly with pliers. Wiggle it back and forth gently instead of pulling straight back. Straight pulling often damages the internal tube further. Small side to side motions help release the connection without breaking components inside.
Once you remove the nozzle, examine the internal tube for damage. A bent or cracked tube cannot spray properly. In this case, you’ll need to replace the entire spray mechanism rather than repair it. Many suppliers sell replacement nozzles and tubes separately.
If the internal tube looks fine, soak the nozzle in warm water for several minutes. This softens dried perfume buildup. Use a thin brush or pipe cleaner to clear any debris from inside the spray stem. Rinse thoroughly and let it dry completely before reattaching.
Test the mechanism over a sink before refilling your bottle with extracted perfume.
Final Thoughts
A dropped perfume bottle does not mean your fragrance is lost. With careful handling, you can save both the bottle and the scent inside it.
Safety comes first in every step of this process. Broken glass can hurt you, so gloves and a sturdy container matter.
Patience is your greatest ally when repairing cracked glass. Rushing the epoxy cure time often leads to failed repairs and wasted effort.
Remember that external application works best for sealing cracks. Internal epoxy can react with your perfume and ruin the scent.
If your nozzle gets stuck, gentle wiggling beats brute force. Pliers help you grip the stem without damaging the delicate parts inside.
Every bottle tells a different story after a drop. Some need simple cleaning, while others need a full nozzle replacement.
Testing your repair thoroughly saves you from future disappointment. Check for leaks and spray function before storing your perfume long term.
Small mistakes can undo hours of careful work. Avoid pulling nozzles straight out or skipping the cleaning stage before repairs.
Your favorite fragrance deserves a second chance after an accident. With the right tools and techniques, most cracks and nozzle issues become fixable problems.
Keep spare tools on hand for future spills or drops. A basic repair kit saves both time and money down the road.
Perfume bottles are more resilient than they look at first glance. With calm hands and clear steps, you can bring a damaged bottle back to life.
Trust the process, follow each step carefully, and your perfume will spray beautifully again soon.
Frequently Asked Questions
Can I save perfume from a cracked bottle?
Yes, you can save your fragrance. Extract the perfume into a clean container before attempting any repairs. Use a small funnel or carefully pour the liquid into a glass jar. This protects your scent from glass shards and prevents mess during the repair process.
What’s the safest way to handle broken glass?
Wear thick gloves when touching cracked areas. Place broken pieces in a sturdy container lined with paper towels. Clean the damaged zone with rubbing alcohol and let it dry completely. Never rush this step, as moisture weakens repairs.
How long does epoxy resin take to cure?
Allow 12 to 24 hours for full curing. Apply the resin only on the outside of the crack. Resist the urge to use your bottle during this waiting period. Premature use causes the repair to fail and wastes your effort.
Why won’t my nozzle reattach after the drop?
The stem base may be slightly bent or misaligned. Grip the stem firmly with pliers and wiggle it gently back and forth. Avoid pulling straight back, as this causes further damage. If the nozzle still won’t budge, soak it in warm water for a few minutes to loosen any stuck residue.
Should I repair the bottle or replace it?
This depends on the damage severity. Small cracks respond well to epoxy resin and hold for years. However, if the bottle structure is severely compromised, transferring your perfume to a new container is safer and more practical.

Hi, I’m Lily! I started this blog to share honest reviews, real comparisons, and helpful guides so you can find your perfect scent without the guesswork. Welcome to my scented world!