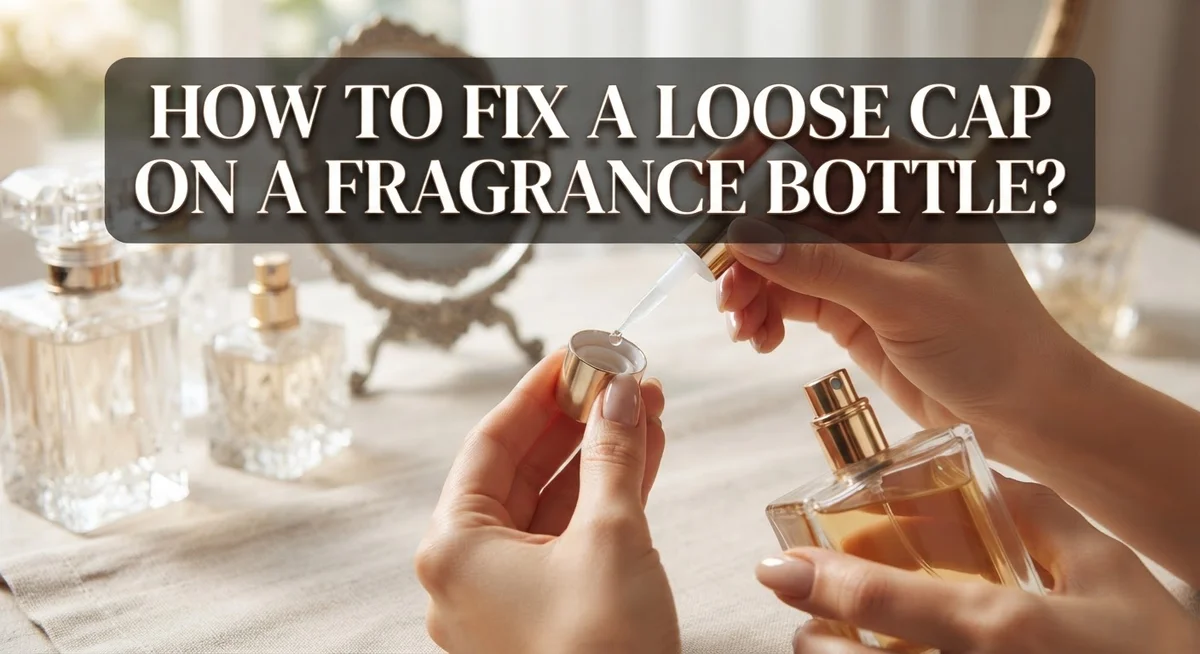
How to Fix a Loose Cap on a Fragrance Bottle?
A loose cap on your favorite fragrance bottle can feel like a small disaster. You twist it, and it still wobbles. Or worse, it pops off in your bag.
This problem happens more often than you think. Mini bottles and certain brands like Dua or Prada Paradoxe are especially prone to this issue.
The good news? You do not need to toss your bottle or live with constant spills. Simple fixes exist, and most use items you already have at home.
In this guide, we will walk through practical solutions step by step. You will learn how super glue and clear nail polish can create a snug fit again.
By the end, you will know exactly how to stop that annoying wobble. Your favorite scent will stay safe, secure, and ready whenever you need it.
In a Nutshell
- Super glue works best. Apply a thin coat of cyanoacrylate glue to the cap’s contact points. Let it dry fully before use.
- Nail polish is a handy backup. Clear nail polish adds grip to the threading area. It works well for a quick fix.
- Spray nozzles need a different approach. Insert a pin gently into the nozzle opening. Move it around softly, then reassemble the cap.
- Tape can add thickness. PTFE tape wrapped around the neck helps tighten a loose fit. This trick works great for mini bottles.
- Avoid common mistakes. Do not apply glue too thick, as it gums up the cap. Always let adhesives cure before twisting the cap on.
- Brand matters. Some brands, like Dua fragrances, have specific quirks. Small adjustments often solve the issue fast.
Why Fragrance Bottle Caps Become Loose Over Time
Fragrance bottle caps loosen for several reasons. Temperature changes cause materials to expand and contract over time. This movement creates tiny gaps between the cap and bottle neck.
Repeated opening and closing wears down the threading inside your cap. Each twist stresses the connection points. Eventually, the fit becomes slack.
Shipping and handling add pressure too. Bottles get jostled in transit. The impact can shift the cap slightly out of alignment. Mini bottles face this problem more often because they have smaller threading that wears faster.
Humidity affects plastic and metal differently. When moisture enters the cap’s interior, it can cause swelling or warping. The cap no longer sits snugly on the bottle.
Manufacturing tolerances play a role here. Some bottles leave the factory with looser caps than others. Certain brands are known for this issue more than competitors. The design itself may allow more movement than necessary.
Fragrance liquid also matters. Some scents contain alcohol that breaks down plastic over time. This degradation weakens the cap’s grip on the bottle neck. The material becomes softer and less effective at holding tight.
Drying out happens too. Plastic caps can become brittle when exposed to air and sunlight. Brittle material loses its flexibility. The cap cannot grip as firmly as it once did.
The good news? Most loose caps are fixable. You do not need professional help or expensive replacements. Understanding why your cap loosened helps you choose the right solution. Whether you use adhesive, tape, or mechanical adjustments, the fix addresses the root cause. Your fragrance stays fresh and secure.
Tools and Materials You’ll Need Before Starting
Before you start fixing your fragrance bottle cap, gather a few simple items from around your home. You likely have most of these already.
Super glue is your first choice. Cyanoacrylate adhesive works best for bonding the cap to the bottle neck. Keep it handy because you will need just a small amount. Do not grab the entire bottle.
Clear nail polish serves as an excellent backup option. This works especially well if you do not have super glue available. The polish adds grip and thickness to contact points without being too permanent.
A fine pin or needle helps with spray nozzle adjustments. Insert it gently into the nozzle opening to clear any blockages or reposition internal parts. This tool is essential for spray mechanism fixes.
PTFE tape (also called plumber’s tape or thread seal tape) adds thickness to loose threads. Wrap it around the bottle neck before screwing the cap back on. This material is thin, flexible, and easy to work with.
You will also need a clean cloth or paper towel for wiping surfaces before applying adhesive. Dust and residue prevent glue from bonding properly.
A small bowl or dish holds your fragrance bottle steady while you work. This prevents accidental spills during the repair process.
Rubbing alcohol cleans the cap and bottle neck thoroughly. This removes oils and old residue that interfere with adhesive bonding.
Finally, gather a steady work surface with good lighting. A kitchen table or desk works perfectly. Good visibility helps you apply adhesive precisely and avoid mess.
These basic materials cost very little and work reliably. Most people have them at home already.
Step-by-Step: Fixing a Loose Cap with Adhesive Methods
Adhesive methods offer reliable solutions for loose fragrance caps. These approaches work best when you apply them correctly and allow proper curing time.
Start with super glue for permanent results. Apply a thin coat of cyanoacrylate directly to the cap’s contact points where it meets the bottle neck. Do not glob it on. A light layer is all you need. Press the cap firmly onto the bottle and hold it for about 30 seconds. Let it cure for at least 24 hours before opening the cap again.
Clear nail polish works as an excellent alternative. This method gives you more control over application. Paint a thin layer on the threading inside your cap or on the bottle’s neck where they meet. The polish dries quickly, so you can test the fit within minutes. This option is gentler than super glue and easier to remove if needed.
Avoid applying adhesive too heavily. Thick coats cause the cap to gum up and stick permanently. You want the cap to stay tight but still open when needed. Apply just enough to create friction between surfaces.
Allow full curing time before use. Rushing this step defeats the purpose. Super glue needs a full day. Nail polish needs at least 2 to 3 hours in dry conditions.
Test the fit carefully after curing. Gently try to open the cap. It should feel snug but not impossible to remove. If it is too tight, you applied too much adhesive.
These adhesive methods work for most fragrance bottles, including mini sizes and spray bottles. The key is patience and using minimal product.
Step-by-Step: Fixing Spray Nozzle and Atomizer Issues
When your spray nozzle sticks or the atomizer won’t spray properly, you can fix it without replacing the whole mechanism. Start by removing the atomizer cover if your bottle has one. This gives you full access to the internal parts.
Take a fine pin or needle and insert it gently into the nozzle opening. Move the pin around slowly in circular motions. This action dislodges any dried fragrance or debris blocking the spray path. Be careful not to force it or push too hard. You want to clear the blockage, not damage the tiny opening.
After clearing the nozzle, reassemble the atomizer cover and test the spray. If it works better but still feels stiff, repeat the process. Sometimes multiple gentle passes work better than one aggressive attempt.
For a loose atomizer that wobbles on the bottle, you can add thickness to improve the fit. Wrap PTFE tape around the atomizer’s base where it connects to the bottle. Start with one thin layer and test the fit. Add more layers if needed until the atomizer sits snugly without forcing.
If the spray mechanism feels weak even after clearing, the internal spring may need adjustment. Gently tap the nozzle against a hard surface a few times. This can reset the spring tension. Then test the spray again.
Never use excessive force when working with spray mechanisms. The components are delicate and break easily. If your nozzle remains completely stuck after gentle attempts, the atomizer may need replacement rather than repair. Most fragrance bottles allow you to purchase replacement atomizers separately, which costs far less than buying a new bottle.
Mechanical Fixes: Using Tape and Other Tightening Techniques
PTFE tape offers a practical mechanical solution for loose fragrance caps. This material adds thickness to the threading without permanent adhesives. Wrap the tape around the bottle neck’s threaded area in a clockwise direction, starting from the bottom of the threads and moving upward.
Use two to three thin layers rather than one thick layer. Too much tape makes the cap impossible to remove later. Each wrap should overlap slightly with the previous one. This creates a snug fit without overdoing it.
After wrapping, screw the cap on and test the tightness. The cap should feel secure but still removable with normal hand pressure. If it’s too loose, add another thin layer of tape. If it’s too tight, remove one layer and try again.
This method works especially well for bottles with stripped or worn threads. The tape fills small gaps and irregularities in the threading. It’s also reversible, so you can remove it if needed without damaging the bottle.
For caps that wobble rather than spin loose, consider wrapping tape around the cap’s inner neck instead. This adds thickness to the cap itself, creating a tighter seal against the bottle opening.
Clean the threading area with a dry cloth before applying tape. Any dust or residue reduces the tape’s effectiveness. Make sure your hands are clean when handling the tape.
This mechanical approach works best for bottles with minor looseness. Severely damaged threads may require alternative solutions. The tape remains stable over time and doesn’t dry out like adhesives do. Replace it only when it wears down or loses its grip.
Common Mistakes to Avoid When Repairing a Cap
Fixing a loose fragrance cap seems simple, but mistakes during repair can make things worse. Understanding what to avoid helps you succeed on the first try.
Applying too much adhesive is the biggest error people make. When you use excessive super glue or nail polish, the cap becomes permanently stuck. You won’t be able to open it again without damaging the bottle. Use only a thin, even coat on the contact points where the cap meets the bottle.
Not allowing adhesive to cure fully creates another common problem. If you try to use your fragrance before the glue sets completely, the cap may slip off anyway. Follow the product’s recommended curing time. This usually takes several hours or overnight.
Over tightening mechanical solutions causes damage too. When you wrap tape around threads, don’t pull it so tight that you crush the plastic cap. Gentle, even pressure works best. Test the fit after each layer rather than wrapping everything at once.
Forcing spray nozzles or atomizers leads to broken mechanisms. These parts have delicate internal springs. Aggressive pushing or twisting can bend them permanently. Work slowly and use minimal pressure when clearing blockages.
Skipping the cleaning step before applying fixes reduces effectiveness. Dust, oils, and residue prevent adhesives from bonding properly. Wipe the cap and bottle neck with a dry cloth first.
Finally, using the wrong repair method for your specific bottle wastes time. Mini bottles and spray atomizers sometimes need different approaches than standard caps. Assess your bottle type before starting repairs. This prevents frustration and ensures your fragrance stays secure and ready to use.
Troubleshooting: What to Do If the Fix Doesn’t Hold
Sometimes your fix doesn’t hold. The cap loosens again after a few days or weeks. This happens for several reasons, and knowing why helps you try a better approach next time.
Adhesive failures occur when you don’t let the glue cure completely. Super glue needs time to set properly. If you use the bottle too soon, the bond breaks apart. Wait the full recommended time before testing your cap. Temperature changes can also weaken adhesive bonds. If your bathroom gets steamy or cold, the glue may fail faster.
Mechanical fixes like tape sometimes slip over time. The tape loses grip as the bottle gets handled repeatedly. Oils from your hands can reduce stickiness too. If tape keeps failing, try wrapping it tighter or adding another thin layer. Clean the area first with a dry cloth to remove any residue.
Your cap might need a different solution entirely. If adhesive failed once, consider switching to a mechanical method. If tape didn’t work, try adhesive instead. Some bottles have threading that’s too worn for either fix to last long.
Heavy use causes problems too. Fragrance bottles get twisted on and off constantly. This movement stresses whatever fix you applied. If you use the bottle daily, any repair faces extra wear.
Consider whether your bottle needs professional help. Some caps are simply damaged beyond home repair. The threading might be stripped completely. The cap’s seal might be broken. In these cases, exploring replacement options makes more sense than repeated failed fixes.
Track what method you tried and how long it lasted. This information helps you choose better solutions for future bottles.
Brand-Specific Considerations and Quirks
Different fragrance brands have their own quirks when it comes to cap tightness. Some manufacturers use thinner threading, while others rely on friction fit designs. Understanding your specific brand helps you choose the right repair method.
Mini bottles and travel sizes often have the loosest caps. These smaller containers use thinner materials and tighter tolerances. The same adhesive and tape methods work, but you need extra care with application. A single drop of super glue is enough for mini bottles. Too much causes permanent sticking that prevents future opening.
Certain luxury brands are known for loose caps straight from the factory. This isn’t a defect—it’s their design choice. These bottles prioritize aesthetic appearance over tight sealing. If your brand falls into this category, mechanical solutions like tape work better than adhesive. Adhesive can damage the finish on premium bottles.
Spray nozzle designs vary significantly between brands. Some use push and twist mechanisms, while others rely on simple friction. Before applying any fix, identify whether your issue is the cap itself or the nozzle assembly. A loose nozzle needs different treatment than a spinning cap.
Test your fix carefully based on your brand’s material. Plastic caps respond differently than metal ones. Aluminum caps handle adhesive well, but plastic caps sometimes crack under pressure. Verify your bottle material before committing to any repair method.
Document what worked for your specific brand. This information helps you fix future bottles from the same manufacturer. Brand specific forums and communities often share proven solutions. Check these resources before attempting repairs on expensive fragrances. Your brand’s customer service can also recommend approved fixing methods.
Final Thoughts
A loose fragrance cap is a small problem with an easy fix. You don’t need special skills or expensive tools to solve it.
Super glue and nail polish work well for most bottles. They fill small gaps and create a snug fit again.
For spray nozzle issues, a simple pin can clear blockages. This restores smooth spraying without any mess.
Mechanical fixes like tape offer a safer option. They add bulk without permanent changes to your bottle.
Remember to always test your fix on a small area first. This helps you see how the bottle material reacts.
Patience makes a real difference in these repairs. Rushing the adhesive curing process often leads to failure.
Give glue enough time to set properly. This simple step prevents many common problems.
Every fragrance bottle is a little different. What works for one brand might not work the same way for another.
Keep testing gently until you find the right method for your specific bottle. Your effort pays off with a cap that stays secure.
A tight cap protects your fragrance from air exposure. This helps the scent last longer and stay fresh.
Loose caps also risk spills during travel or storage. A quick fix now saves you from bigger messes later.
Try these methods with confidence. They are practical, affordable, and simple to apply at home.
With the right approach, your fragrance bottle can feel brand new again. A secure cap means you enjoy your favorite scent without any worry.
Small fixes often lead to lasting results. Take your time, follow the steps, and your bottle will serve you well for years to come.
Frequently Asked Questions
Why is my fragrance bottle cap loose right out of the box?
Loose caps happen during manufacturing or shipping. Mini bottles and travel sizes often have this problem more than full size bottles. Some luxury brands are known for shipping with loose caps straight from the factory. The cap threading may not align perfectly, or the seal wasn’t tightened enough during production.
This is not a defect you caused. It’s a common quality control issue. The good news? You can fix it easily at home with simple methods.
Can I use super glue to fix a loose fragrance cap?
Yes, super glue works well for most bottles. Apply a thin coat to the cap’s contact points where it meets the bottle. Let it cure fully before using the bottle again. This usually takes 24 hours.
Do not apply too much glue. Heavy amounts will gum up the cap and make it harder to remove later. A thin layer is all you need for a secure hold.
What should I do if the spray nozzle is stuck or won’t spray?
Insert a clean pin into the nozzle opening. Gently move it around to clear any blockages inside. Remove the atomizer cover first if your bottle has one. Reassemble everything carefully after cleaning.
This simple fix often works for spray issues. The nozzle may have dried fragrance residue blocking the spray mechanism.
Is clear nail polish a good alternative to super glue?
Clear nail polish is a safe alternative for many bottles. Apply it to the threading areas where the cap connects. It dries quickly and holds well. Some people prefer this method because it’s easier to remove later if needed.
Both methods work. Choose whichever you have available at home.
Can I fix mini perfume bottle caps the same way?
Yes, the same methods apply to mini and travel size bottles. Their caps are actually looser than full size bottles more often. Use the same thin coat technique with either super glue or nail polish. Be extra gentle with mini bottles since they’re more delicate overall.

Hi, I’m Lily! I started this blog to share honest reviews, real comparisons, and helpful guides so you can find your perfect scent without the guesswork. Welcome to my scented world!